Egne Kort
New feature: Add your own custom maps to the Web application!
Here at QR-Patrol, we have been working hard to provide you with new, unique features such as to ensure that you have the best user experience!
We are excited to introduce you to the latest such feature, driven by your very own requests: the ability to upload your own custom maps to QR-Patrol! Using this function, you are enabled to view your Guards actions on the Events Browser on top of your personal maps layers, thus having a much more personalised view!
You can upload a map by following the steps below:
- While logged in the Web Application, click on "Company" menu and on the drop-down menu click "Custom Maps"
- At the top left of the new screen, click "Add"
- Click on "Upload new image" button and select an image (the map file) from your computer
- (Optional) After the image is uploaded, type the Name/Description of your choice under the respective fields

- Once your map has been uploaded, you need to place the three Markers (1,2,3) on the image (e.g. see screenshot below)
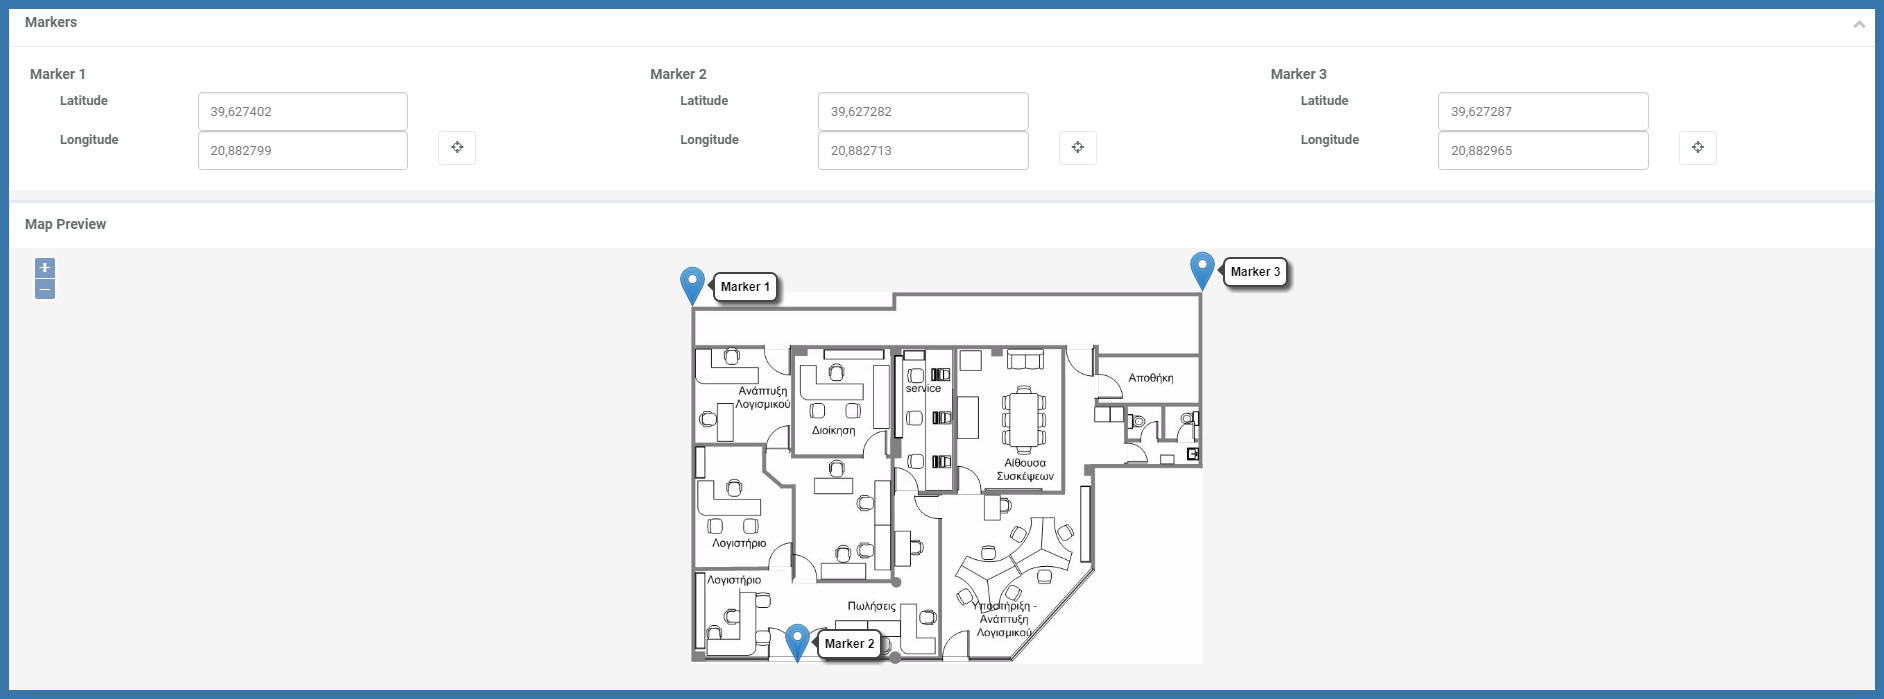
Important Note: For optimal results, the Markers should be placed on the 3 corners of the map image; if not possible, then it is essential that they are at least not aligned, and are as far as possible from each other.
- For each Marker, define the respective Latitude and Longtitude values or
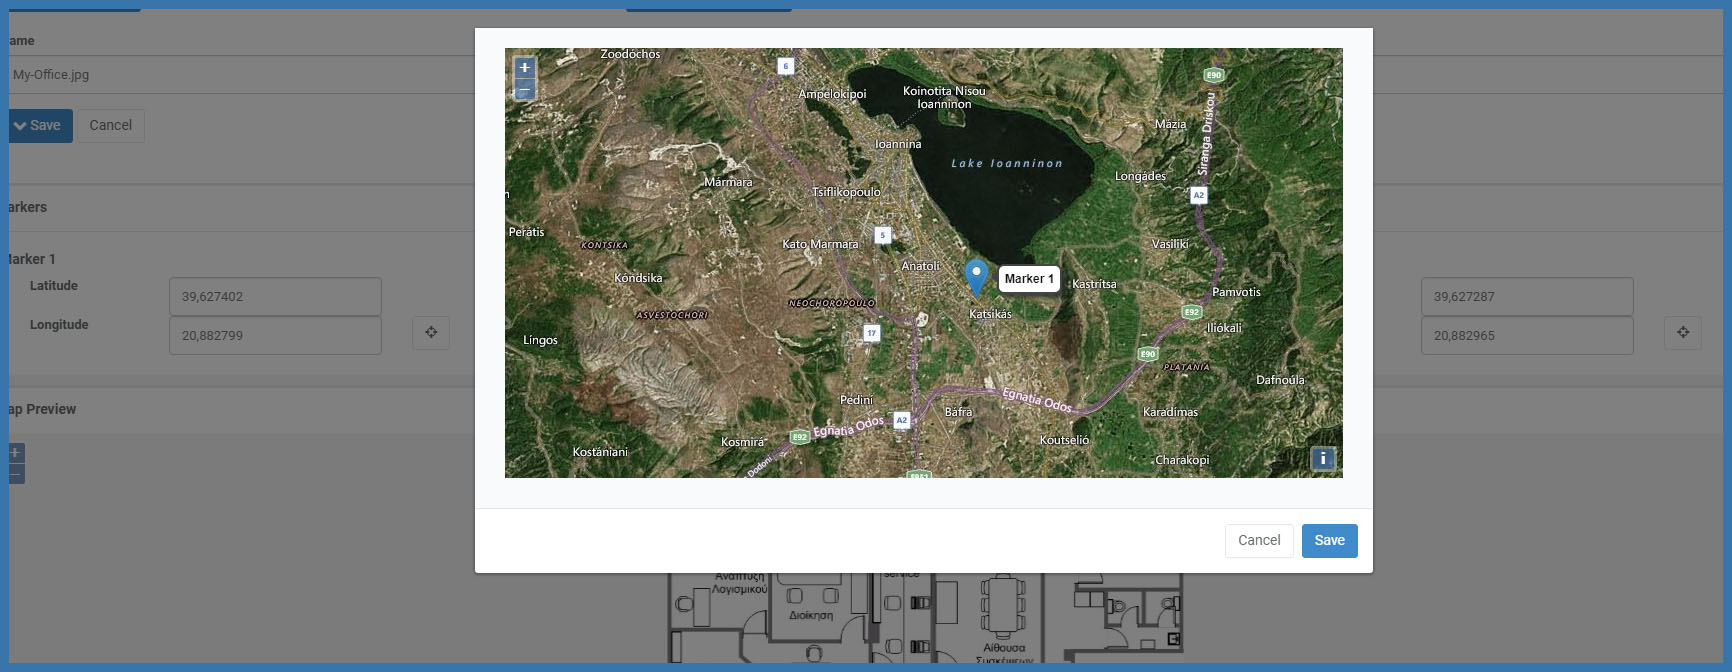
- Alternatively, press on the target icon, displayed next to each Marker; the system opens a pop-up page with a map in order to place the marker to the point fon interest!
- (Optional) If you wish to, you can assign one or more checkpoints to the map file; Click on the "Assigned Checkpoints" button and select the target checkpoint(s) from the checkpoints list (see image below)
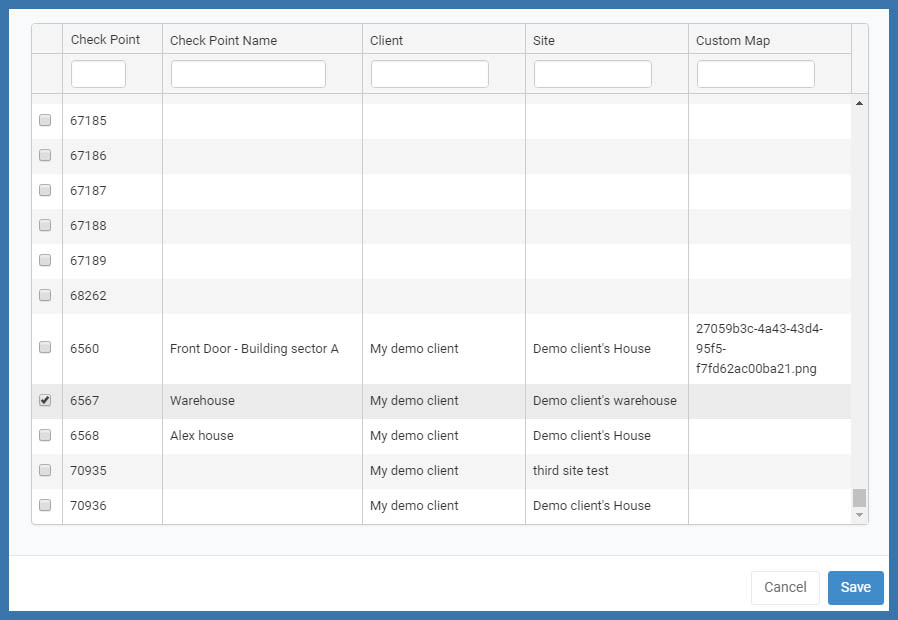
Note: This is helpful for buildings with more than one floors, since it enables you to view that particular floor (for the Scan/MME/Incident events of the respective checkpoints) on the Events Browser!
- Finally, press on "Save" button
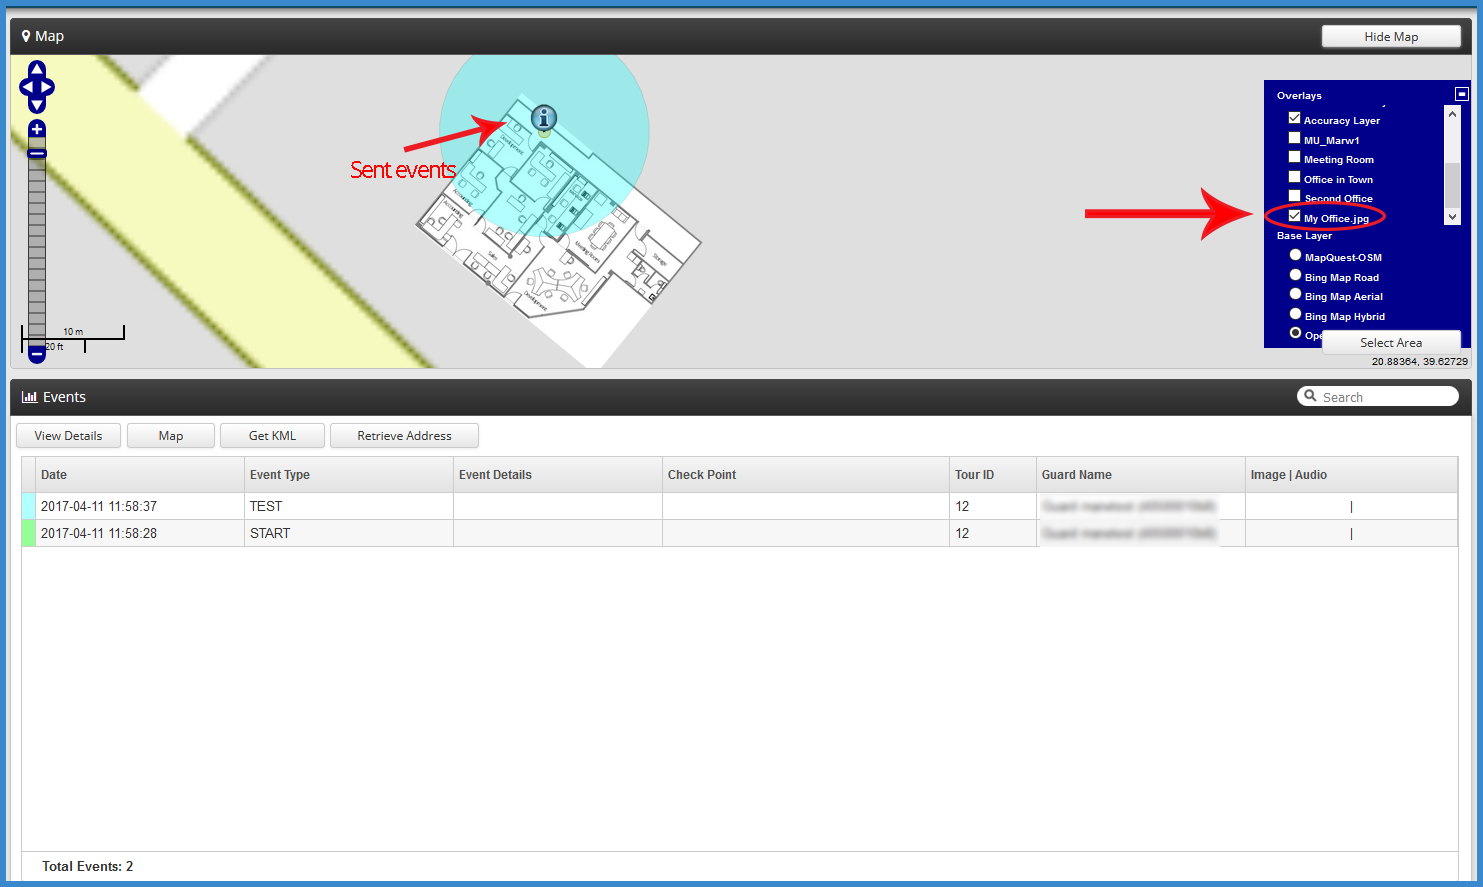
Your map has been set-up! Now, every time a Guard sends some event within the defined by the map location, or scans some checkpoint assigned to that map file, you can check his actions on the Events Browser above (or around) the uploaded map! This can be defined via the Events Browser:
- Click on the "+" icon on top right of your Events Browser
- On the Overlays list, the system displays among others the map image(s) you have inserted; ensure that it is checked and any event sent within that area will be displayed on the map image!
We hope that you will be as delighted as we are with this latest addition!
For any inquiry or question, contact our sales team.